Add Documentation
Why does a plugin need documentation? A peek plugin needs documentation to help developers focus on what it needs to do, and allow other developers to use the APIs it shares.
Then it helps Peek admins determine the plugins requirements and if there is a need for it.
Documenting software can be a complicated and a tedious task. There are many things to consider:
- Documentation must be versioned with the code, making sure features match, etc.
- Documentation must be available for each version of the code, your documentation will branch as many times as your code will, 1.0, 1.1, etc
- Documentation must be updated as features are added and changed in the code.
These are a few of the conundrums around the complexity of software documentation. Fortunately there are some fantastic tools around to solve these issues, and you’re reading the result of those tools right now.
Document Generator
Sphinx is a tool that makes it easy to create intelligent and beautiful documentation.
The following sections go on to guide the reader to setup Sphinx Document Generator.
Important
Windows users must use bash and run the commands from the plugin root directory.
Documentation Configuration
The build configuration file has already been setup by Synerty.
Create Directories docs
The docs folder will contain all of the files used to build the documentation.
Make sure you add everything in this directory to git.
The dist folder will contain all of the generated documentation. These files
should not be in git as they are reproducible, see
Build Documentation
Create directories docs and dist, run the following command:
mkdir -p docs
Download file docs/conf.py
The conf.py file contains the configuration required to build the documentation.
Synerty has created a version of this file that automatically generates the api doc RST files.
Download conf.py from
synerty-peek/docs/conf.py
to docs/conf.py.
Modify these values:
__project__ = 'Synerty Peek'
__copyright__ = '2016, Synerty'
__author__ = 'Synerty'
__version__ = '#.#.#'
At the very end of conf.py file, you will see imports and calls to
createApiDocs(peek_plugin_xxx.__file__) method.
If your plugin will have a python API, then update these two lines to import your plugin, and generate API documentation for it.
From:
import peek_plugin_base
createApiDocs(peek_plugin_base.__file__)
Example To:
try:
    import peek_plugin_tutorial

except ImportError:
    # Otherwise, add the plugin root dir to the import path, for read the docs.
    sys.path.append(os.path.dirname(os.path.dirname(__file__)))
    import peek_plugin_tutorial

createApiDocs(peek_plugin_tutorial.__file__)
Otherwise, comment it out.
Required Files
Note
All instructions in this document are relative to the plugin root directory (the one with hyphens), not the plugin python package (the one with underscores).
Add Directory _static
The _static is required for the doc build.
Create the directory with this command:
mkdir docs/_static
Add File .gitkeep
The docs/_static/.gitkeep ensures that the _static directory will exist in git.
Create file docs/_static/.gitkeep with no contents.
Create it with this command:
touch docs/_static/.gitkeep
Add Directory overview
The overview will contain the the overview.rst file and all images
that it uses. For now, there are none.
Create the directory with this command:
mkdir docs/overview
Add File overview.rst
The docs/overview/overview.rst Should contain a basic overview of the plugin.
Create file docs/overview/overview.rst and populate it with the following
contents:
========
Overview
========

Plugin Objective
----------------

The goal of this plugin is to ...


Plugin Uses
-----------

Possible uses for this plugin are ...


How It Works
------------

This plugin achieves it's functionality by ...
Add Directory api
The api will contain the the index_api.rst file and all images
that it uses. For now, there are none.
Create the directory with this command:
mkdir docs/api
Add File index_api.rst
The index_api.rst contains links to any information useful to other
develeopers wanting to leverage this plugin
Create file docs/api/index_api.rst and populate it with the following
contents:
.. _api_reference:

=============
API Reference
=============

.. toctree::
    :maxdepth: 2
    :caption: Contents:

    ../api_autodoc/peek_plugin_tutorial/peek_plugin_tutorial
Add file index.rst
The index.rst file will add relations between the single files that the
documentation is made of, as well as tables of contents.
See TOC tree
Note
Add more files to plugin table of contents by addding them after
overview/overview
Create index.rst, and populate it with the following:
==================================
{insert plugin name} Documentation
==================================

.. toctree::
    :maxdepth: 3
    :caption: Contents:

    overview/overview
    api/index_api

Indices and tables
==================

* :ref:`genindex`
* :ref:`modindex`
* :ref:`search`
Add file rtfd_requirements.txt
The rtfd_requirements.txt is required for building docs on readthedocs.org
Create docs/rtfd_requirements.txt, and populate it with the following:
pytmpdir
peek_plugin_base
Build or Debug
You have created all the configuration files for the documentation generator, let’s make a first build of the docs.
You can either Build Documentation or Debug Documentation
Build Documentation
This section will build the documentation locally as HTML files. From there the developer can copy it somewhere else, etc.
Note
If this is NOT the first build of the documentation or you have previously
run the
Debug Documentation, you will need to cleanup
the old dist files. Run the command
rm -rf dist/*
Sphinx-build
A build is started with the sphinx-build program, called like this:
[ -d dist ] && rm -rf dist
mkdir -p dist/docs
sphinx-build -b html docs/ dist/docs/
Note
The -b option selects a builder; in this example Sphinx will build HTML files.
A successful build should look like this:
peek@DESKTOP-U08T8NG MINGW64 ~/peek-plugin-tutorial (master)
$ sphinx-build -b html docs/ dist/docs/
Running Sphinx v1.5.3
making output directory...
loading pickled environment... not yet created
building [mo]: targets for 0 po files that are out of date
building [html]: targets for 3 source files that are out of date
updating environment: 3 added, 0 changed, 0 removed
reading sources... [100%] module
looking for now-outdated files... none found
pickling environment... done
checking consistency... done
preparing documents... done
writing output... [100%] module
generating indices... genindex py-modindex
highlighting module code... [100%] peek_plugin_tutorial
writing additional pages... search
copying static files... done
copying extra files... done
dumping search index in English (code: en) ... done
dumping object inventory... done
build succeeded.
Open dist/docs/index.html
The generated documentation files are in the dist/docs folder.
Open dist/docs/index.html in a web browser to view the generated documentation.
Debug Documentation
Synerty has written a shell script that runs a sphinx auto build utility. It builds the documentation when a file is modified.
Note
If this is NOT the first debugging of the documentation or you have
previously run the
Debug Documentation, you will need to cleanup
the old dist files. Run the command
rm -rf dist/*
Download File watch-docs.sh
The watch-docs.sh script runs an auto building / auto refreshing web server that
is fantastic for quick local documentation development.
Download watch-docs.sh from
synerty-peek/docs/watch-docs.sh
to docs/watch-docs.sh
Edit docs/watch-docs.sh to update the plugin package name.
Change the line:
ARGS="$ARGS --watch `modPath 'peek_plugin_base'`"
to:
ARGS="$ARGS --watch `modPath 'peek_plugin_tutorial'`"
Run watch-docs.sh
cd docs/
./watch-docs.sh
In a web browser, go to the following url:
http://localhost:8020
The watch-docs.sh shell script will rebuild the documentation when it see a change
in the docs folder.
Note
The watch-docs.sh shell script won’t always build a change in the
toctree while running. If you update the toctree or modify headings it is good
practice to stop watch-docs.sh, run rm -rf dist/* and restart
watch-docs.sh.
Publish Documentation on readthedocs
Read the Docs hosts documentation, making your documentation fully searchable and easy to find. Your documentation can be imported from versioning control such as Git. Read the Docs support webhooks to build the documentation after the latest code commit.
Create an account on Read the Docs
Add a Project to Read the Docs
View “My Projects”
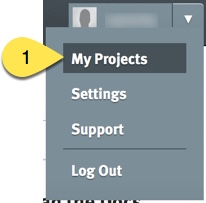
- Go to the users drop down at the top right and select “My Projects”
Import Projects
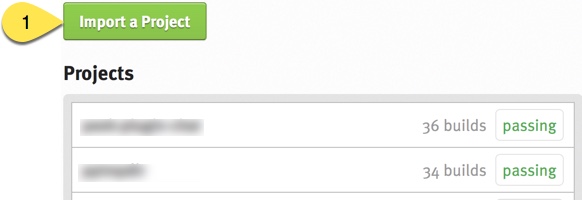
- Select “Import a Project”
Import Manually

- Select “Import Manually”
Project Details

- Enter the name of the project
- Enter your git repository location
- Select “Next”
Project

- Go to the “Admin” page
Advanced Settings

- Enter the location of the requirements files
- Enter the location of the sphinx configuration file
- Uncheck the “Enable PDF Build”
- Uncheck the “Enable EPUB Build”
- Select the Python interpreter 3.+
Troubleshooting readthedocs
Build the Documentation
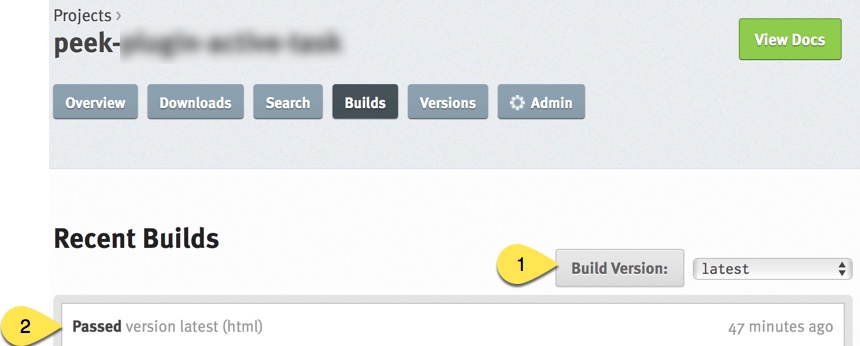
- Force a Documentation build by selecting “Build Version”
- View the recent build log
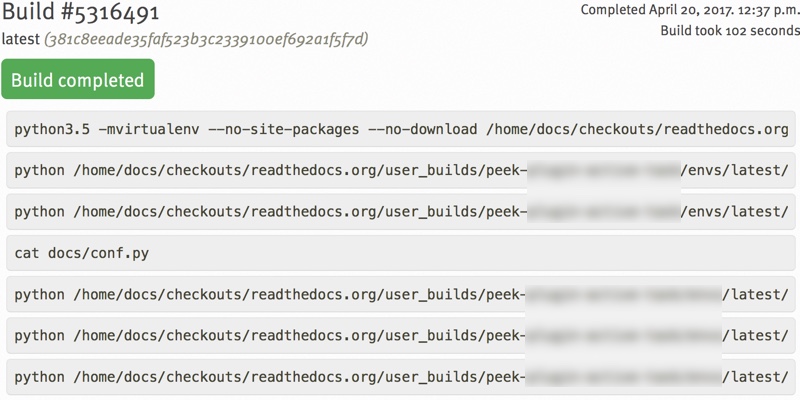
Investigate the build log:
Sections
Sections are created by underlining (and optionally overlining) the section title with a punctuation character, at least as long as the text and a blank line before and after.
These section titles and headings will be used to create the contents when the documentation is built.
Note
- The Page Title can be seen at the top of this page,
- Add Documentation.
- Header 1 can be seen at the top of this section,
- Sections.
Header 2
Sample paragraph.
Header 3
Sample paragraph.
If you expand the page contents you will notice that “Header 3” isn’t available in the page contents. This is because the maxdepth of the toctree is ‘2’. see TOC tree
This is an example of the “Add Documentation”(Page Title), “Sections”(Header 1), “Header 2”, and “Header 3” raw text:
=================
Add Documentation
=================

Sections
--------

Header 2
````````

Header 3
~~~~~~~~
Text Formatting
The following roles don’t do anything special except formatting the text in a different style.
Inline Markups
Inline markup is quite simple, some examples:
- one asterisk:
*text*, text for emphasis (italics), - two asterisks:
**text**, text for strong emphasis (boldface), and - backquotes:
:code:`text`,textfor code samples.
Files
The name of a file or directory. Within the contents, you can use curly braces to indicate a “variable” part, for example:
learn_plugin_development/LearnPluginDevelopment_AddDocs.rst
:file:`learn_plugin_development/LearnPluginDevelopment_AddDocs.rst`
Reference Links
Reference link names must be unique throughout the entire documentation.
Place a label directly before a section title.
The link name will match the section title.
An example of the reference link above the section title:
.. _learn_plugin_development_add_docs:

=================
Add Documentation
=================
An example of the reference link:
:ref:`learn_plugin_development_add_docs`
URL Link
A raw link can be entered without a title, but if a title is entered be sure to leave a space before the URL address:
`Synerty <http://www.synerty.com/>`_
Code Block
Two semi-colons followed by a blank line and two leading tabs for each line of code. The code block is ended by contents written without leading tabs.
this.code
::

        this.code
Directives
Directives are indicated by an explicit markup start ‘.. ‘ followed by the directive type, two colons, and whitespace (together called the “directive marker”). Directive types are case-insensitive single words.
Images
The filename given must either be relative to the source file, or absolute which means that they are relative to the top source directory.
.. image:: synerty_logo_400x800.png
Admonitions
Admonitions are specially marked “topics” that can appear anywhere an ordinary body element can. They contain arbitrary body elements. Typically, an admonition is rendered as an offset block in a document, sometimes outlined or shaded, with a title matching the admonition type.
Note
Multi Line NOTE
Mutli Parapgraph
- Can contain bullets
- numbers points
and references: Add Documentation
.. note:: Multi
    Line
    NOTE

    Mutli Parapgraph

    -     Can contain bullets

    #.    numbers points

    and references: :ref:`learn_plugin_development_add_docs`
TOC tree
This directive inserts a table of contents at the current location, including sub-TOC trees.
Document titles in the toctree will be automatically read from the title of the referenced document.
Here is an example:
=====================
Example Documentation
=====================

.. toctree::
    :maxdepth: 2
    :caption: Contents:

    intro
    strings
    datatypes
    numeric
    (many more documents listed here)
Docstring Format
This extension sphinx.ext.atuodoc, can import the modules you are documenting,
and pull in documentation from docstrings in a semi-automatic way.
Warning
autodoc imports the modules to be documented. If any modules have side effects on import, these will be executed by autodoc when sphinx-build is run. If you document scripts (as opposed to library modules), make sure their main routine is protected by a if __name__ == ‘__main__’ condition.
A docstring is a string literal that occurs as the first statement in a module, function, class, or method definition.
All modules should normally have docstrings, and all functions and classes exported by a module should also have docstrings. Public methods (including the __init__ constructor) should also have docstrings. A package may be documented in the module docstring of the __init__.py file in the package directory.
Example:
"""
This is a reST style.

:param param1: this is a first param
:param param2: this is a second param
:returns: this is a description of what is returned
:raises keyError: raises an exception
"""
Below is an abstract from file
peek_plugin_tutorial/_private/server/ServerEntryHook.py, create in the step
Add File ServerEntryHook.py.
def load(self) -> None:
    """ Start

    This will be called to start the plugin.
    Start, means what ever we choose to do here. This includes:

    -   Create Controllers

    -   Create payload, observable and tuple action handlers.

    """
    logger.debug("Loaded")
Below is an abstract from file
peek-plugin-base/peek_plugin_base/PeekPlatformCommonHookABC.py
class PeekPlatformCommonHookABC(metaclass=ABCMeta):

    @abstractmethod
    def getOtherPluginApi(self, pluginName:str) -> Optional[object]:
        """ Get Other Plugin Api

        Asks the plugin for it's api object and return it to this plugin.
        The API returned matches the platform service.

        :param pluginName: The name of the plugin to retrieve the API for
        :return: An instance of the other plugins API for this Peek Platform Service.

        """
What Next?
Start developing your own plugins.